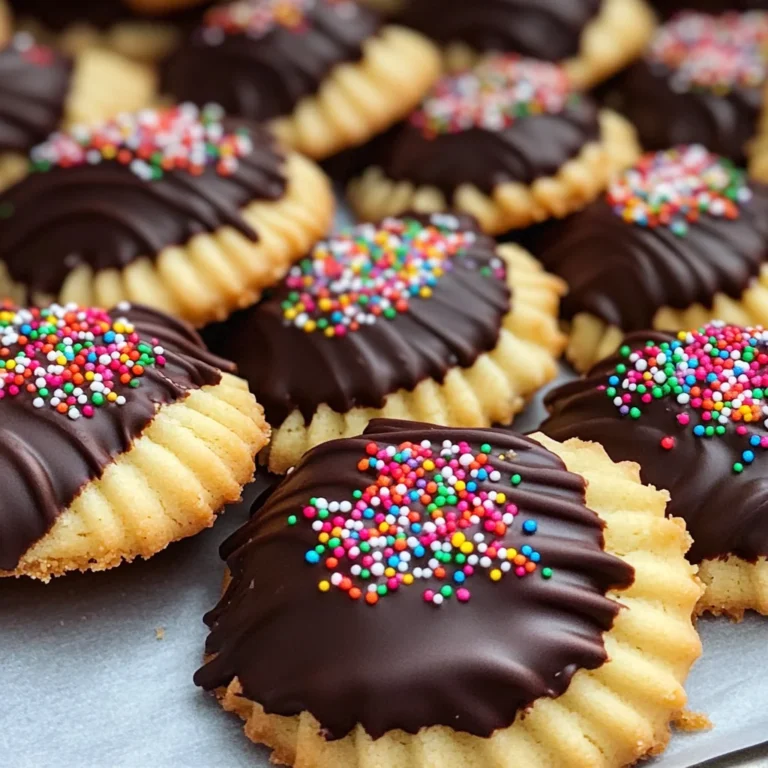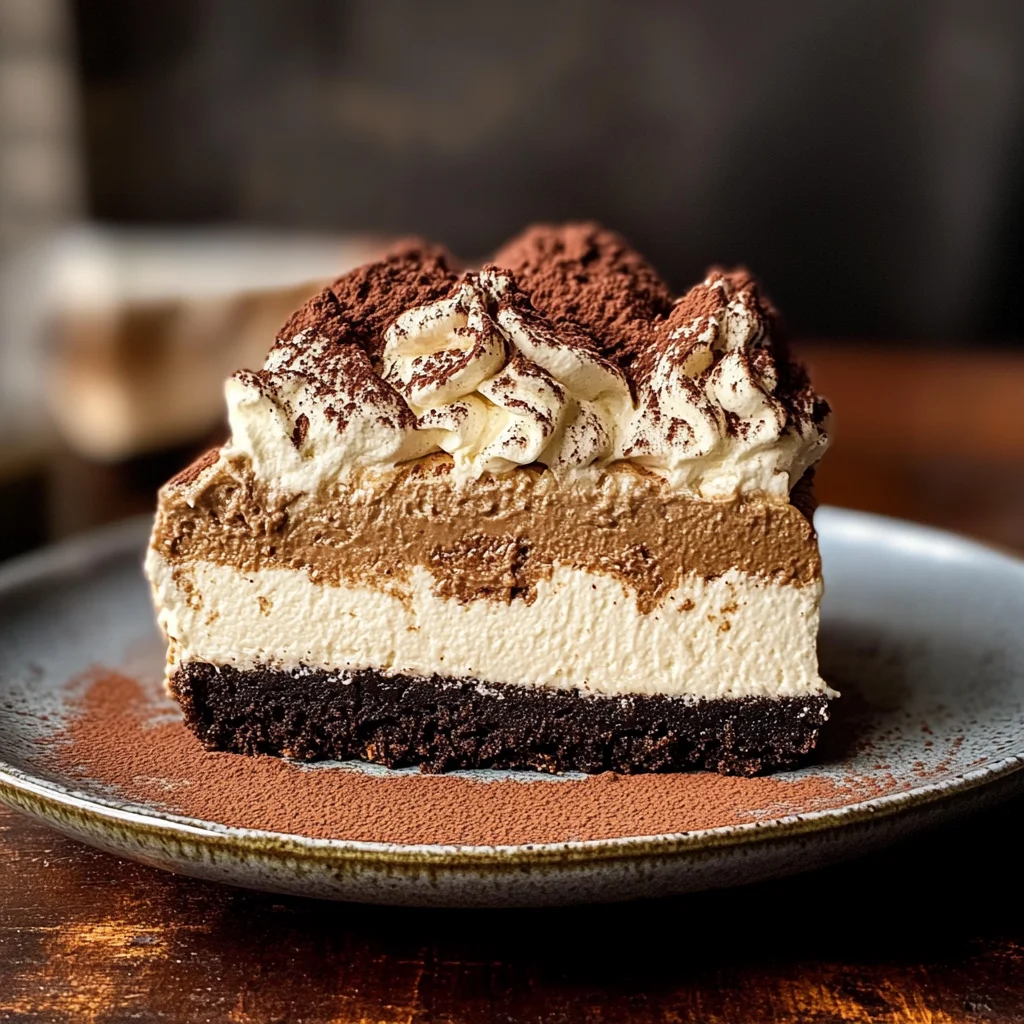
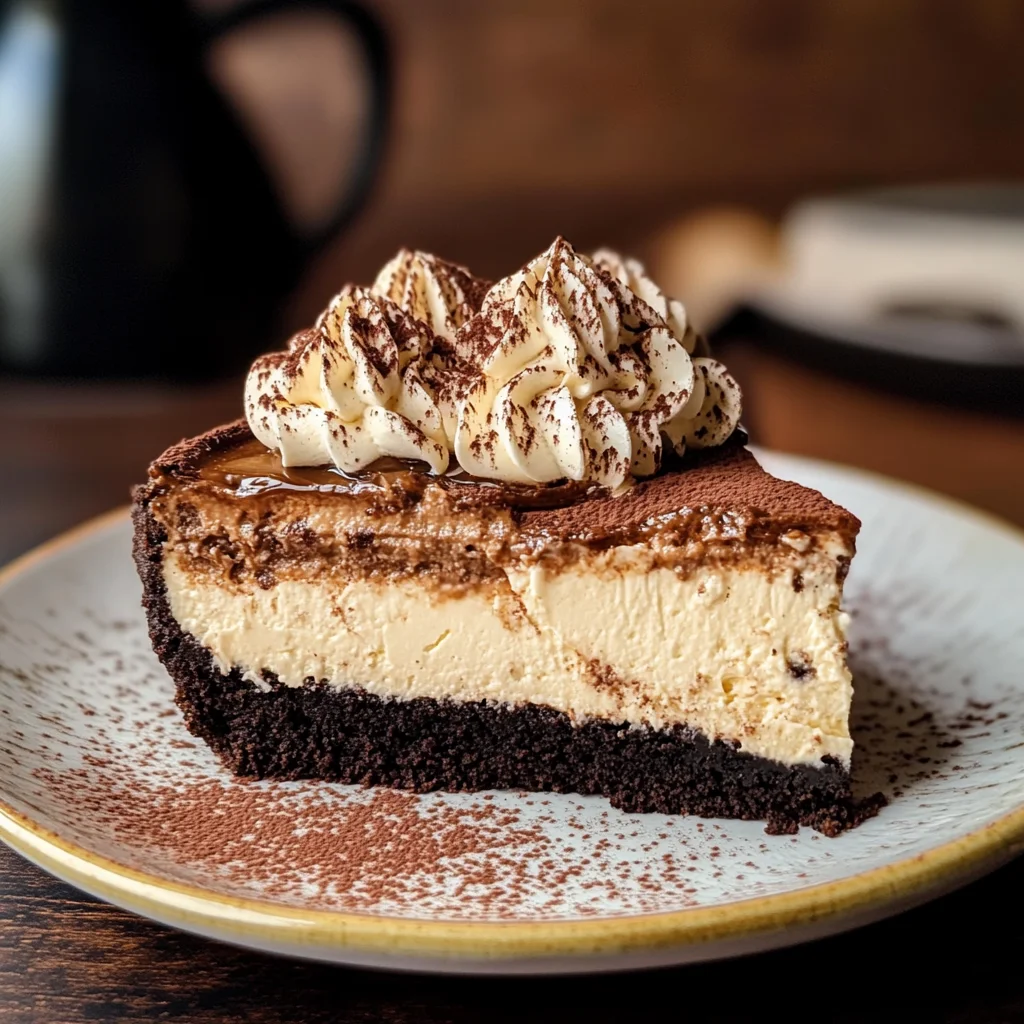
Tiramisu Cheesecake
This Tiramisu Cheesecake is a delightful dessert that perfectly marries the rich flavors of espresso and creamy cheesecake. With its Oreo crust and luxurious whipped mascarpone topping, this dessert is sure to impress at any gathering. Whether you’re celebrating a special occasion or simply indulging yourself, this cheesecake offers a unique twist on the classic Italian tiramisu, making it an irresistible choice for coffee lovers everywhere.
Why You’ll Love This Recipe
- Decadent Flavor: The combination of espresso and creamy cheesecake provides a rich taste that coffee lovers will adore.
- Easy Preparation: With straightforward steps, this recipe simplifies the process of making a gourmet dessert.
- Impressive Presentation: The layered look topped with cocoa powder ensures your cheesecake looks as good as it tastes.
- Versatile Serving Options: Serve it at parties, family gatherings, or as a treat for yourself—this cheesecake fits any occasion.
- Make Ahead: This dessert can be prepared in advance, allowing the flavors to meld beautifully over time.
Tools and Preparation
Before diving into our delicious recipe, gather your tools and equipment. Having everything ready will make your baking experience smoother and more enjoyable.
Essential Tools and Equipment
- Springform pan
- Mixing bowls
- Electric mixer
- Rubber spatula
- Measuring cups and spoons
Importance of Each Tool
- Springform pan: Ideal for cheesecakes, it allows easy removal without damaging the delicate dessert.
- Electric mixer: Saves time and effort, ensuring your cream cheese mixture is smooth and fluffy.
- Rubber spatula: Perfect for scraping down the sides of bowls and folding in ingredients without deflating your mixture.
Ingredients
For the Crust
- 3 cups Oreos (Fine crumb equal to 26 Oreos)
- 5 TBSP Unsalted butter (melted)
For the Cheesecake Filling
- 32 oz Cream cheese (room temperature)
- 1 cup Brown sugar (packed light or dark)
- 2 tsp Pure vanilla extract
- 3/4 cup Sour cream (room temperature)
- 1/3 cup Prepared Espresso (room temperature 1/3 cup hot water and 1 tsp of espresso powder)
- 4 Large eggs (room temperature)
- 1 Egg yolk (room temperature)
For the Topping
- 12 Ladyfingers
- 4 oz Mascarpone cheese (cold)
- 1/2 cup Powdered sugar (sifted)
- 1 tsp Pure vanilla extract
- 1 cup Heavy cream (cold)
- 1/4 cup Cocoa powder (for dusting)
How to Make Tiramisu Cheesecake
Step 1: Prepare the Crust
- Preheat your oven to 350°F (175°C).
- In a mixing bowl, combine crushed Oreos with melted butter.
- Press this mixture firmly into the bottom of a springform pan to form an even crust.
- Bake for about 10 minutes until set. Let it cool while you prepare the filling.
Step 2: Make the Cheesecake Filling
- In a large bowl, beat together room temperature cream cheese and brown sugar until smooth.
- Add in vanilla extract, sour cream, prepared espresso, eggs, and egg yolk. Mix until well combined but do not overmix.
- Pour this creamy mixture over your cooled crust in the springform pan.
Step 3: Bake the Cheesecake
- Bake in the preheated oven for about 60-70 minutes or until the center is just set but still slightly jiggly.
- Turn off the oven and leave the cheesecake inside for another hour to cool gradually.
- Once cooled, refrigerate for at least 4 hours or preferably overnight.
Step 4: Prepare the Topping
- In a separate bowl, whip together cold heavy cream, mascarpone cheese, powdered sugar, and vanilla extract until soft peaks form.
- Carefully spread this whipped mixture over your chilled cheesecake.
Step 5: Assemble with Ladyfingers and Cocoa Dusting
- Soak ladyfingers briefly in prepared espresso before placing them on top of the whipped cream layer.
- Dust generously with cocoa powder before serving.
Enjoy every bite of this indulgent Tiramisu Cheesecake, perfect for any celebration or just because!
How to Serve Tiramisu Cheesecake
Serving tiramisu cheesecake can turn any occasion into a special celebration. Here are some delightful ways to present this dessert that will impress your guests.
Individual Slices
- Serve each slice on a decorative plate. Drizzle with chocolate or caramel sauce for an extra touch of sweetness.
Coffee Pairing
- Pair your cheesecake with a strong cup of brewed coffee. The flavors complement each other beautifully and enhance the espresso notes in the cake.
Fresh Berries
- Add a side of fresh berries such as strawberries or raspberries. Their tartness balances the rich creaminess of the cheesecake.
Whipped Cream
- Top each slice with a dollop of whipped cream for added fluffiness. You can even sprinkle cocoa powder on top for an elegant finish.
Chocolate Shavings
- Garnish with dark chocolate shavings for a luxurious look. This adds a nice texture and elevates the flavor profile.
How to Perfect Tiramisu Cheesecake
Creating the perfect tiramisu cheesecake is all about attention to detail. Here are some tips to ensure your dessert is flawless.
-
Use Room Temperature Ingredients: Ensure that all dairy products are at room temperature before mixing. This helps achieve a smooth and creamy texture.
-
Don’t Overmix: Mix the cheesecake batter just until combined. Overmixing can introduce too much air, leading to cracks during baking.
-
Bake in a Water Bath: Using a water bath helps regulate temperature, preventing the cheesecake from cracking. Wrap your pan in foil and place it in a larger pan filled with hot water.
-
Chill Properly: After baking, allow the cheesecake to cool slowly before refrigerating. A proper chill ensures it sets correctly and enhances its flavors.
Best Side Dishes for Tiramisu Cheesecake
Enhancing your tiramisu cheesecake experience can be achieved by serving it alongside complementary dishes. Here are some great options:
-
Espresso Brownies: Rich and fudgy brownies infused with espresso for an extra caffeine kick.
-
Vanilla Ice Cream: Classic vanilla ice cream adds a creamy component that pairs well with the cheesecake’s flavors.
-
Fruit Salad: A light fruit salad provides freshness and balances the richness of the dessert.
-
Chocolate Mousse: Decadent chocolate mousse brings another layer of flavor and indulgence to your meal.
-
Coconut Macaroons: Chewy macaroons add texture and sweetness that contrasts nicely with the creamy cheesecake.
-
Pistachio Biscotti: Crunchy biscotti gives a delightful crunch and nutty flavor that complements the dessert’s richness.
-
Almond Cookies: Light almond-flavored cookies offer a delicate sweetness without overpowering the main dessert.
-
Caramel Sauce: A drizzle of homemade caramel sauce enhances flavors while providing additional sweetness when served alongside each slice.
Common Mistakes to Avoid
When making Tiramisu Cheesecake, it’s easy to make a few common errors. Here are some tips to ensure your dessert turns out perfectly.
-
Boldly using cold ingredients: Cold cream cheese or eggs can lead to lumps in your cheesecake. Always make sure to bring these ingredients to room temperature before mixing.
-
Boldly skipping the cooling time: Rushing the cooling process may cause the cheesecake to crack. Allow it to cool completely in the oven with the door slightly ajar before transferring it to the fridge.
-
Boldly overmixing the batter: Overmixing can add too much air and create cracks during baking. Mix just until combined, especially after adding eggs.
-
Boldly ignoring ingredient measurements: Accurate measurements are key for a balanced flavor and texture. Use a kitchen scale for precision, particularly for ingredients like brown sugar and cream cheese.
-
Boldly underestimating chilling time: This cheesecake needs adequate chilling to set properly. Allow at least 4 hours, or preferably overnight, in the refrigerator before serving.
Storage & Reheating Instructions
Refrigerator Storage
- Store leftover Tiramisu Cheesecake in an airtight container.
- It will last up to 5 days in the refrigerator.
- Cover the top with plastic wrap to prevent drying out.
Freezing Tiramisu Cheesecake
- Wrap individual slices tightly in plastic wrap, then place in a freezer-safe container.
- It can be frozen for up to 3 months.
- Thaw in the refrigerator overnight before serving.
Reheating Tiramisu Cheesecake
-
Oven: Preheat your oven to 300°F (150°C). Place slices on a baking sheet and warm for about 10 minutes.
-
Microwave: Heat individual slices on medium power for 30 seconds at a time until warmed through.
-
Stovetop: Place slices in a skillet over low heat, cover with a lid, and warm gently for about 5 minutes.
Frequently Asked Questions
Here are some common questions about Tiramisu Cheesecake that might help you as you prepare this delicious dessert.
What is Tiramisu Cheesecake?
Tiramisu Cheesecake is a delightful fusion of traditional tiramisu flavors combined with creamy cheesecake, featuring an Oreo crust and espresso elements.
Can I substitute ingredients in Tiramisu Cheesecake?
Yes! You can replace heavy cream with coconut cream for a dairy-free option or use alternative sweeteners if desired.
How should I serve Tiramisu Cheesecake?
Serve chilled, garnished with additional cocoa powder or chocolate shavings for an elegant touch that enhances its visual appeal.
How do I know when my Tiramisu Cheesecake is done baking?
The edges should be set while the center remains slightly jiggly. It will firm up as it cools down in the fridge.
Final Thoughts
This Tiramisu Cheesecake combines rich flavors and textures that coffee lovers will adore. Its versatility allows for various customization options, such as using different types of cookies for the crust or adding layers of fruit. Don’t hesitate—try this recipe today and impress your friends and family!
Tiramisu Cheesecake

This Tiramisu Cheesecake is a show-stopping dessert that combines the rich flavors of creamy cheesecake with the robust essence of espresso, all nestled in a delectable Oreo crust. With its layers of smooth mascarpone topping and delicate ladyfingers, this dessert is perfect for coffee enthusiasts and will leave your guests in awe at any gathering. Ideal for celebrations or as a treat to indulge yourself, this unique twist on the classic Italian dessert promises to satisfy your sweet cravings.
- Prep Time: 30 minutes
- Cook Time: 70 minutes
- Total Time: 1 hour 40 minutes
- Yield: Serves approximately 12 slices 1x
- Category: Dessert
- Method: Baking
- Cuisine: Italian
Ingredients
- 3 cups Oreos (finely crushed)
- 5 tablespoons unsalted butter (melted)
- 32 oz cream cheese (room temperature)
- 1 cup brown sugar (packed)
- 2 teaspoons pure vanilla extract
- 3/4 cup sour cream (room temperature)
- 1/3 cup prepared espresso
- 4 large eggs (room temperature)
- 12 ladyfingers
- 4 oz mascarpone cheese (cold)
- 1 cup heavy cream (cold)
- Cocoa powder (for dusting)
Instructions
- Preheat your oven to 350°F (175°C). In a bowl, mix crushed Oreos and melted butter. Press into the bottom of a springform pan and bake for about 10 minutes. Let cool.
- In another bowl, beat cream cheese and brown sugar until smooth. Add vanilla, sour cream, espresso, eggs, and mix until combined but not overmixed.
- Pour the filling over the cooled crust and bake for 60-70 minutes until set but slightly jiggly in the center. Cool in the oven for an hour before refrigerating for at least four hours or overnight.
- Whip heavy cream with mascarpone, powdered sugar, and vanilla until soft peaks form. Spread over chilled cheesecake.
- Soak ladyfingers briefly in espresso, arrange on top of whipped cream, and dust with cocoa.
Nutrition
- Serving Size: 1 serving
- Calories: 320
- Sugar: 20g
- Sodium: 310mg
- Fat: 22g
- Saturated Fat: 13g
- Unsaturated Fat: 8g
- Trans Fat: 0g
- Carbohydrates: 28g
- Fiber: 1g
- Protein: 6g
- Cholesterol: 90mg